How to use an AWS Lambda function to invite users to GitHub private repositories
Probably you've faced a situation where you were applying to a new job and they asked to publish your code into GitHub so they can analyze it. I'm not judging them for doing this, it's a lot easier to read the code online than download some zip (that can't always be trusted) and open it on their local machine. But it's not nice to have your application public accessible. Don't worry, there's an easy and chip solution for that.
Requirements
- GitHub Account
- AWS Account (also possible with free-tier)
- NPM/YARN installed in your machine
Creating your lambda
First things first, what is a Lambda? Well, a Lambda is a piece of code that can be executed dynamically when necessary. It runs on a secure shared server and you'll only pay for what you use of RAM, execution time, and invocations. If you don't use it, you don't need to pay. Simple as that.
Let's search for it in AWS Console.
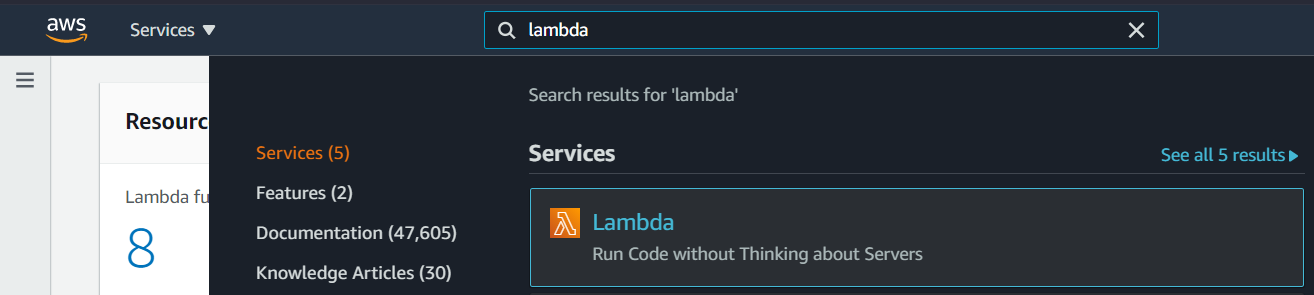
Now, it's time to create your Lambda function. Just click "Create function"
Just a small observation: I'm using the Ohio region just to keep everything organized in my account, but you can use whatever you want.

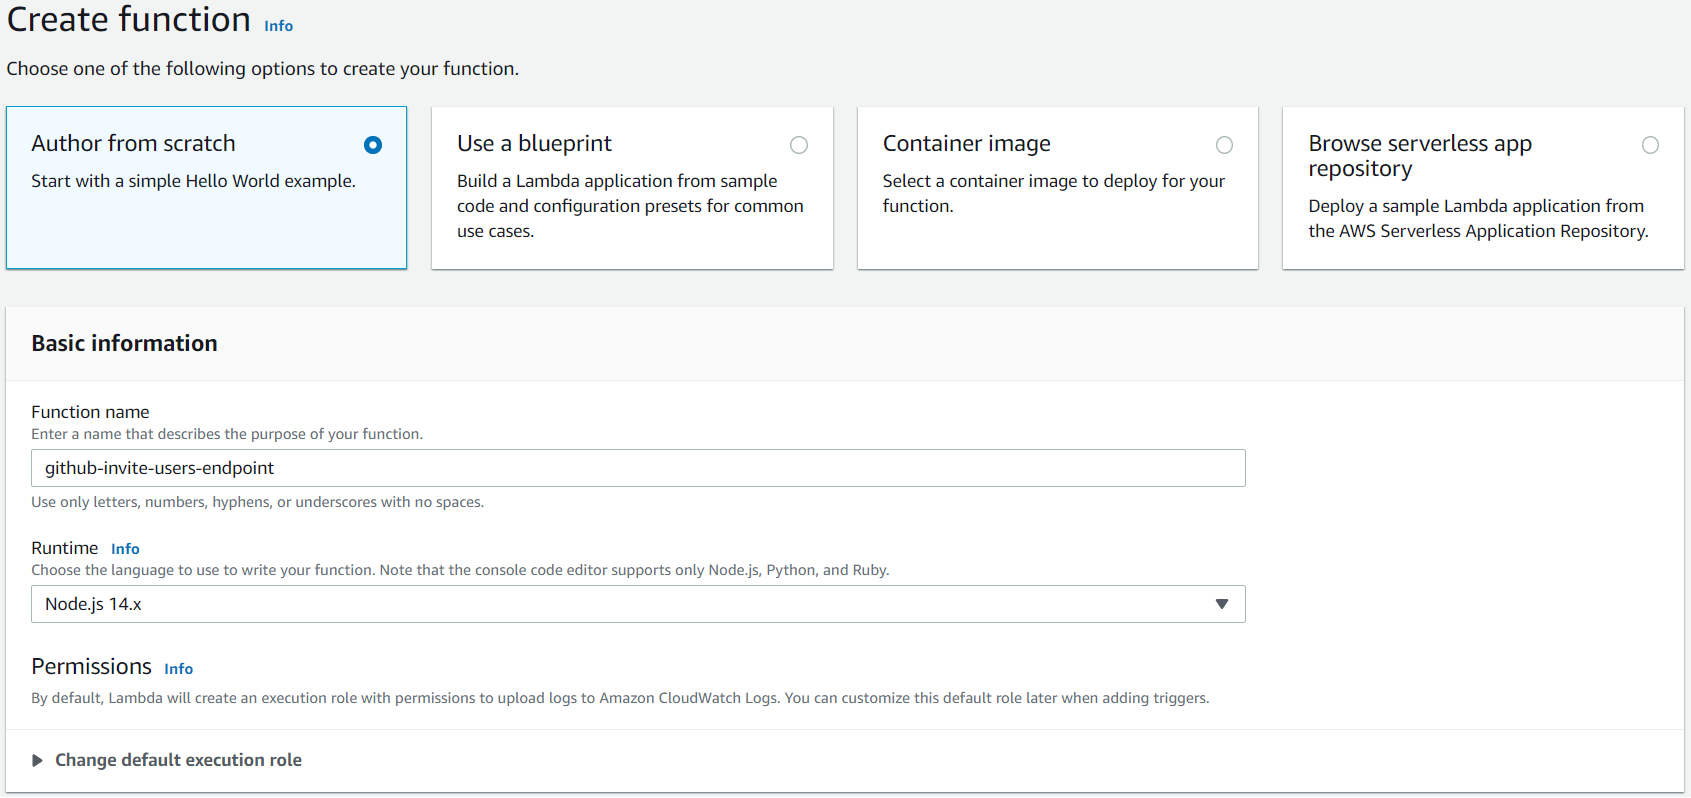
On the opened screen, fill the field function name, and also make sure the Runtime field has the value "Node.js 14x". Once finished, just click "Create function" again.
Now, you can see the function overview and also a code source. We'll be using it soon, but first, we need to create our layer containing the package module we'll use in this lambda.
A Lambda layer is a .zip file archive that can contain additional code or data. A layer can contain libraries, a custom runtime, data, or configuration files. Layers promote code sharing and separation of responsibilities so that you can iterate faster on writing business logic. (Creating and sharing Lambda layers )
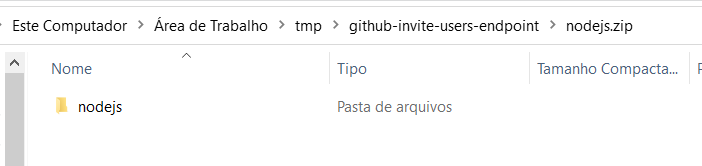
In your computer, create a folder with any name you want (I'll use github-invite-users-endpoint), and inside this folder, create another one named nodejs. The name of the inside folder needs to be exactly as mentioned before.
Enter to the nodejs folder and add the module @octokit/rest using the package manager of your choice. yarn add @octokit/rest or npm install @octokit/rest
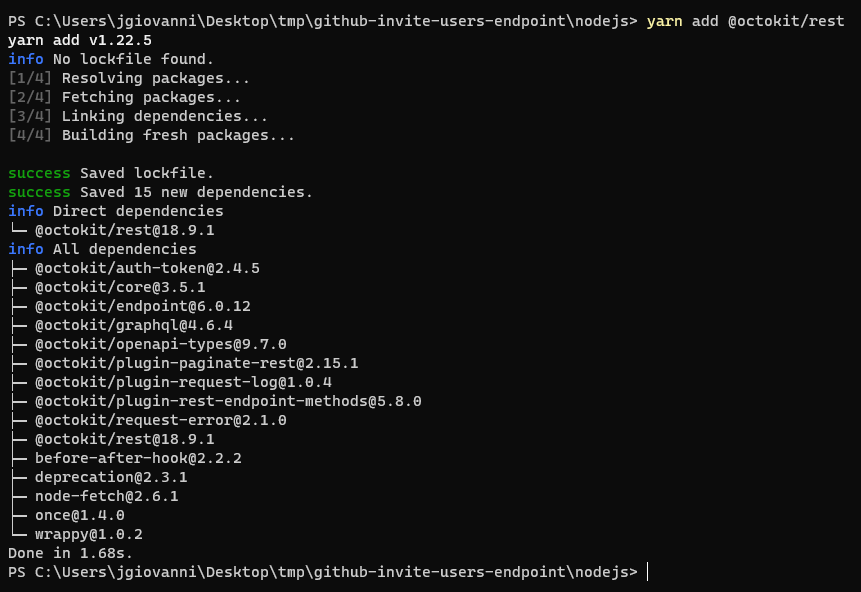
Once the package was installed, zip the nodejs folder. You'll need it.
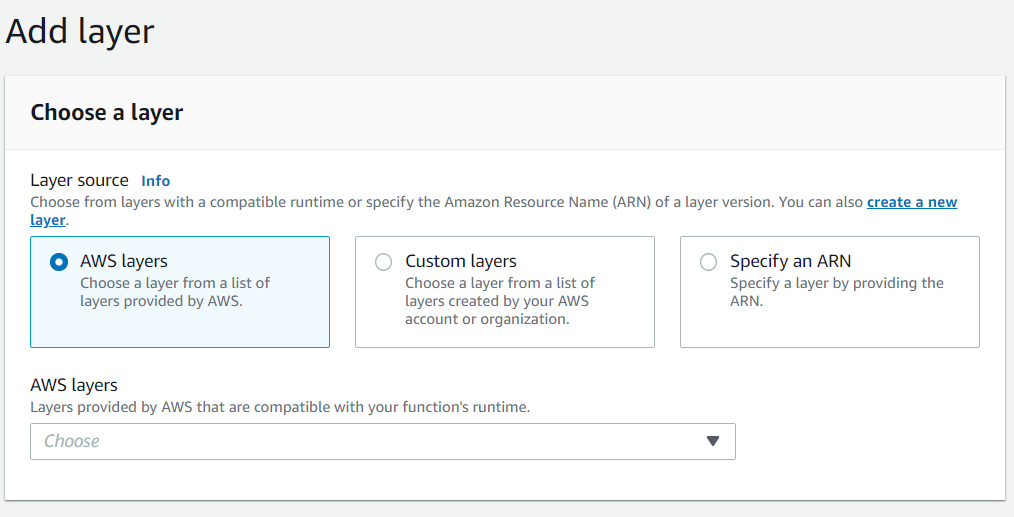
Now, go back to the lambda page and scroll to the bottom to click Add layer, and on the opened screen, click on the link create a new layer right above "Specify an ARN".

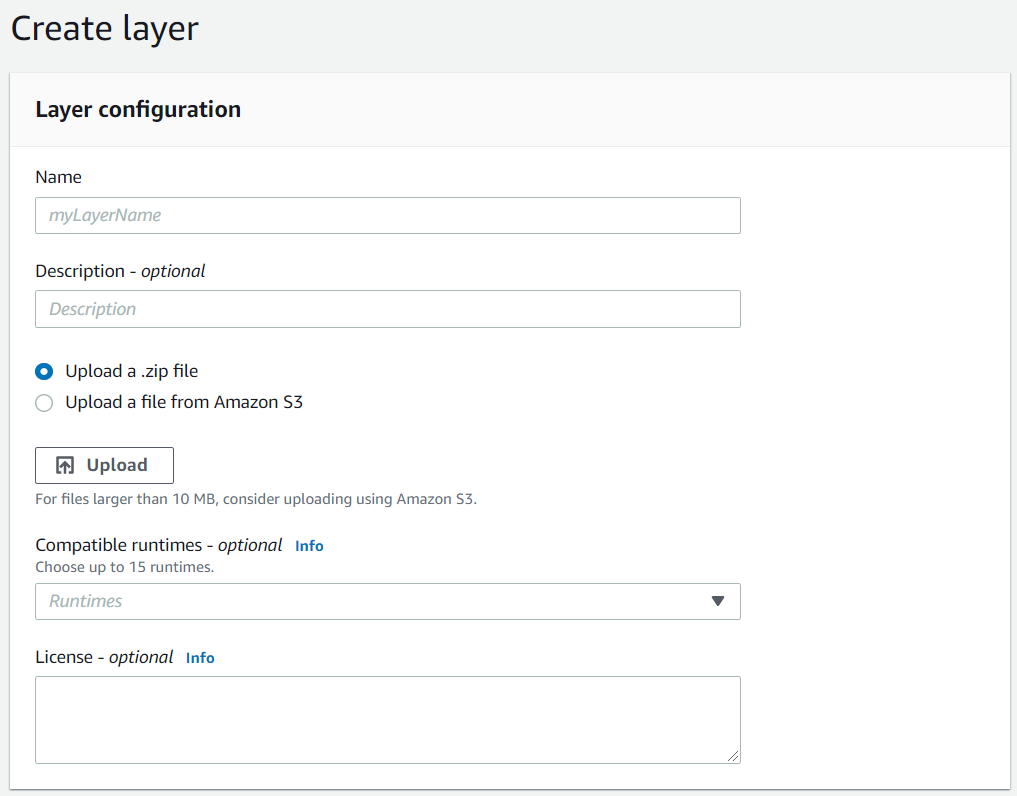
Now, enter the name of the layer (I'll use github-invite-users-endpoint-node-modules) and upload the .zip file we've created before. Select Node.js 14.x in Compatible runtimes. When you finish, create the layer.
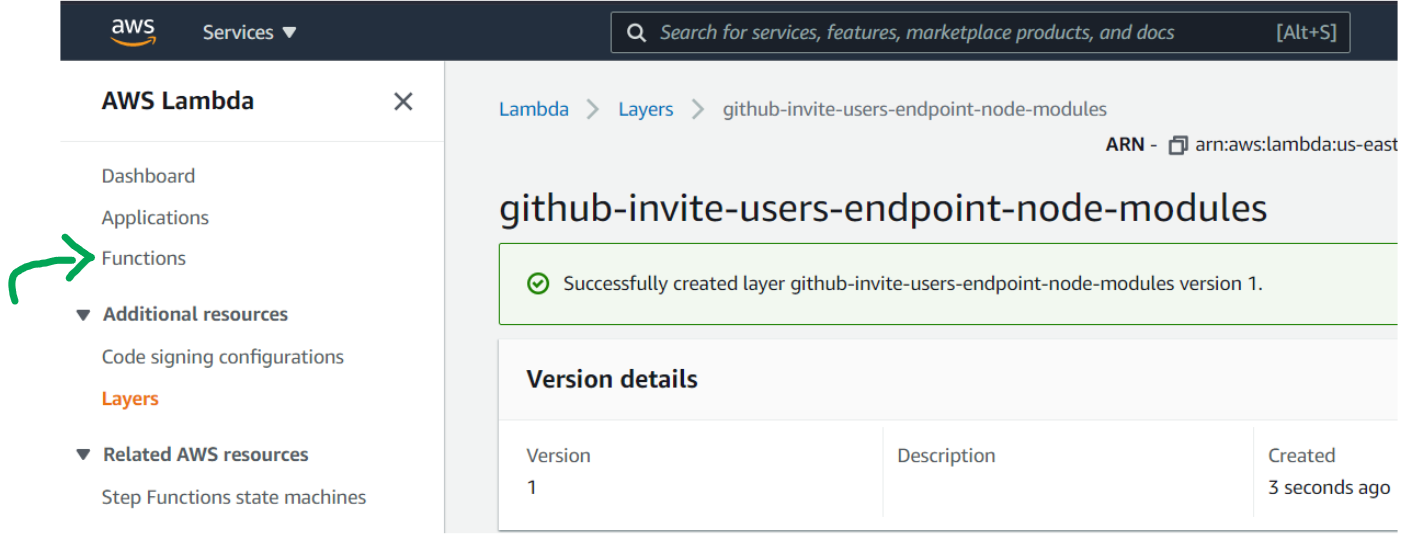
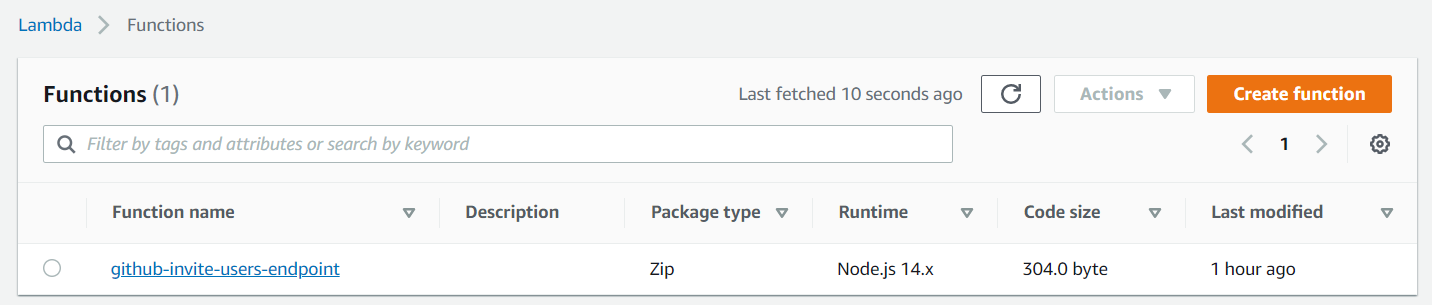
Once created the layer, go back into the Lambda by clicking Functions in the left menu, and then open the previously created function.
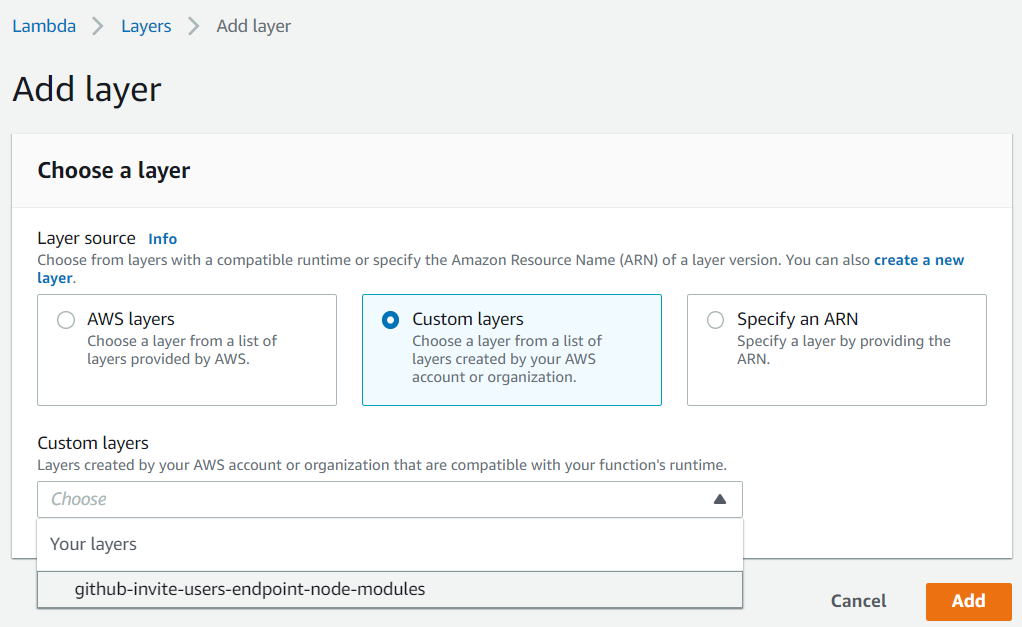
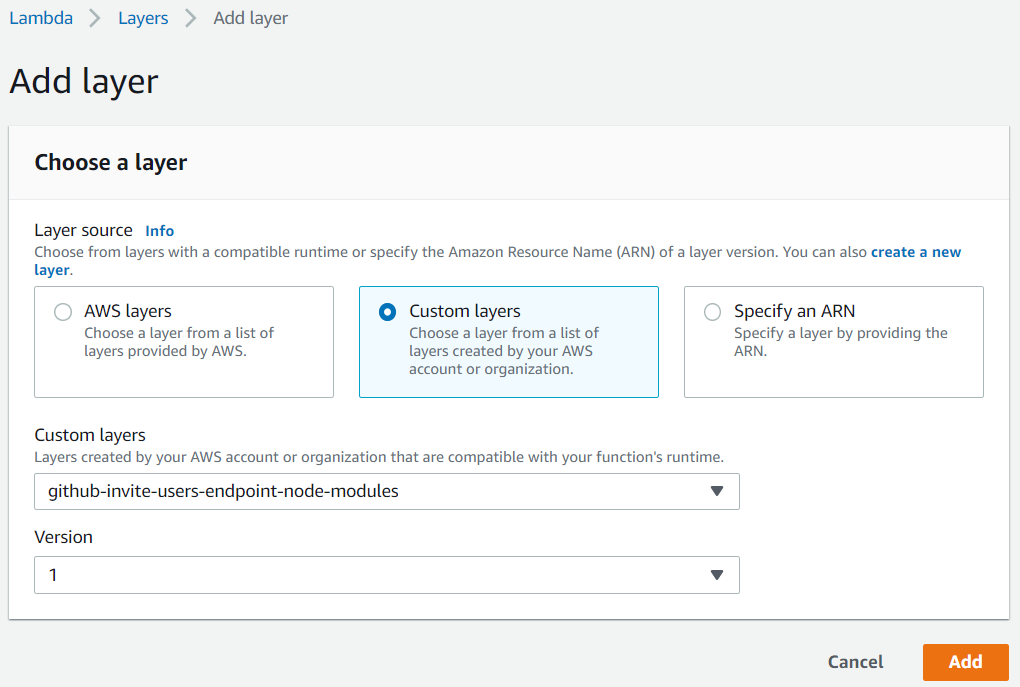
Now, let's add the layer we created into the function. Scroll to the bottom, and click Add a layer. Then, select Custom layers and in the Custom layers field, select the layer you created before. Once you selected, a version field will appear, select the first value of the field, and then click Add to conclude.

Addying a trigger to the Lambda
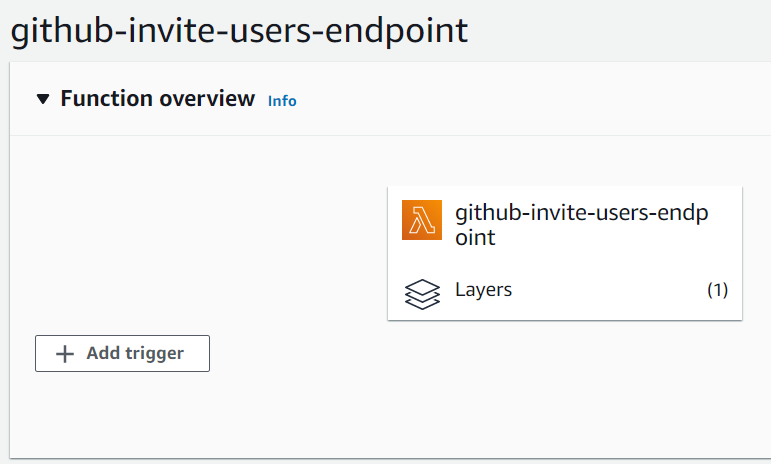
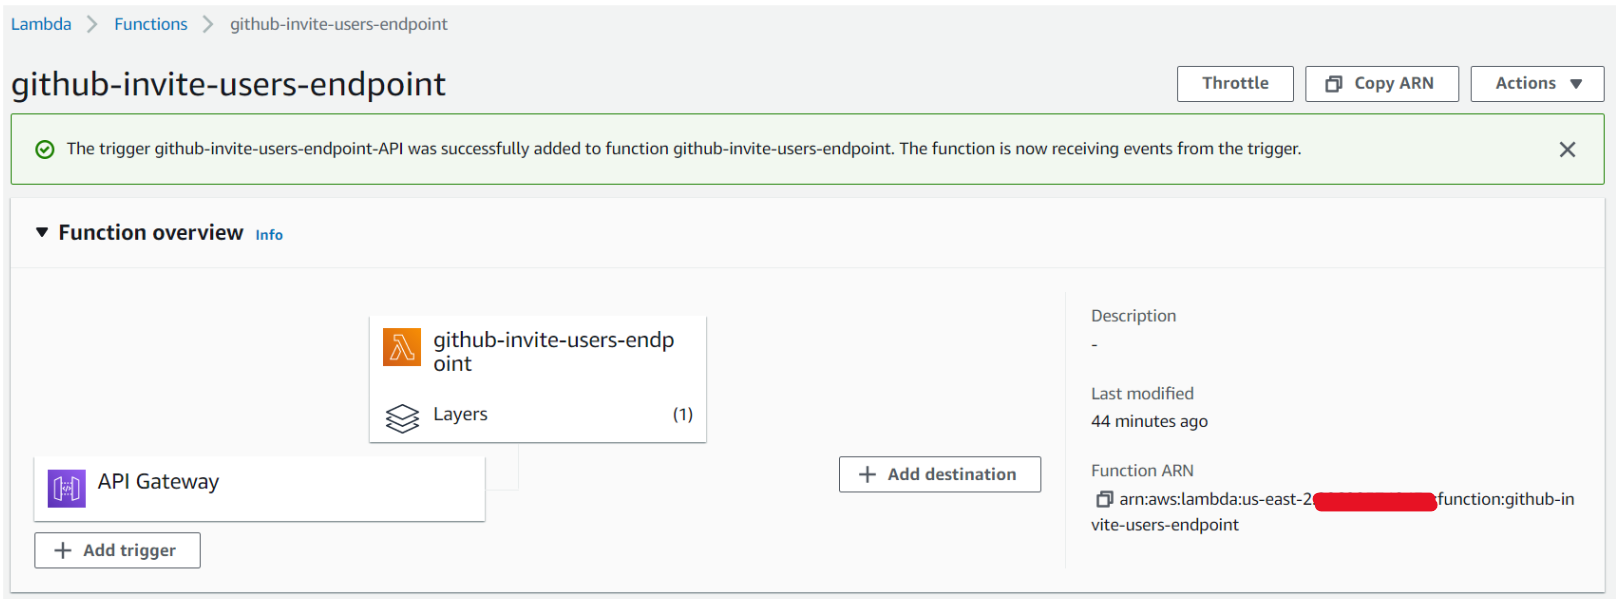
Lambda functions are called by some triggers. Let's configure one called API Gateway that will provide us an endpoint to use the function. In the Function overview, click at Add trigger and then select API Gateway at the next screen field.
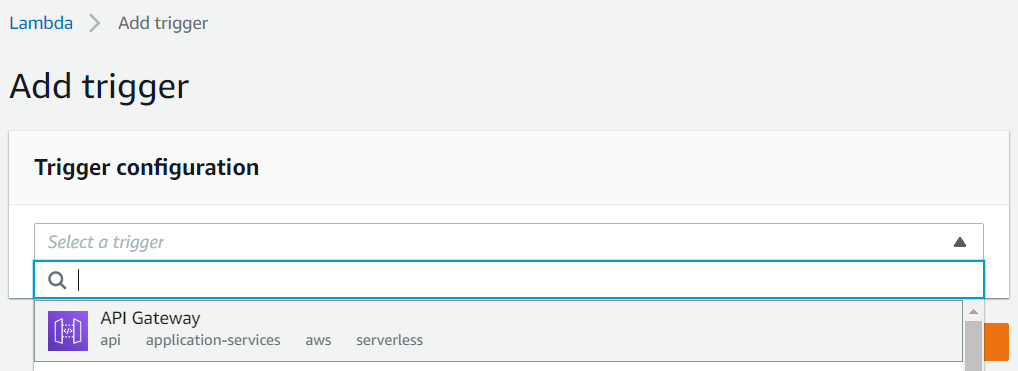
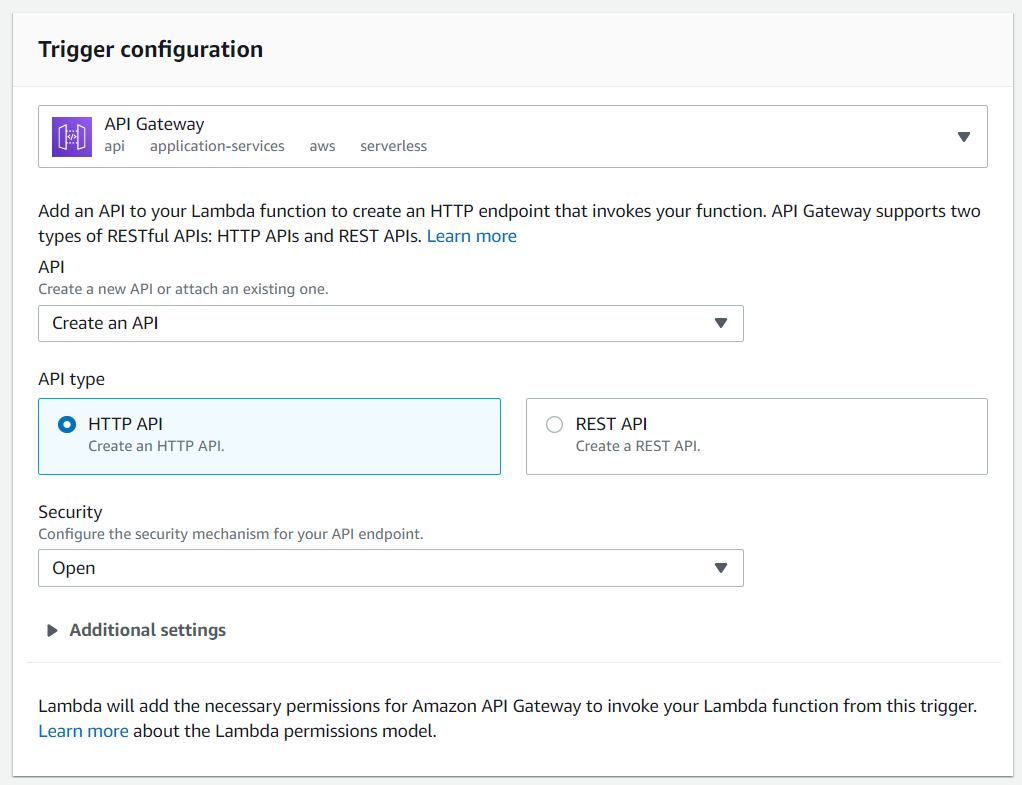
In the trigger configuration, opt to Create an API of type HTTP API, and security Open. To conclude, click Add.
If you click API Gateway right above the Add trigger button, you'll see the Triggers. Click at Details to get the API ENDPOINT for your Lambda.
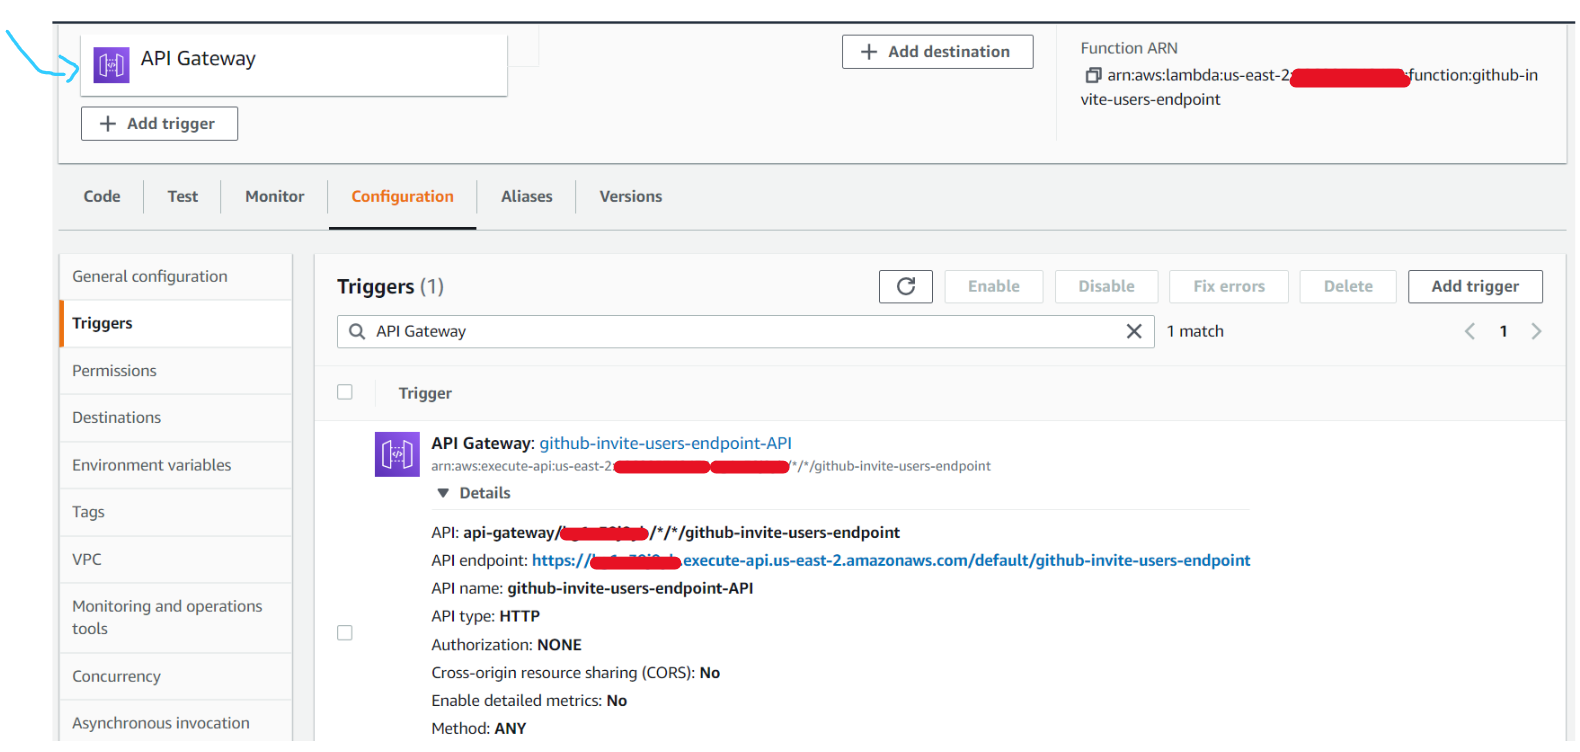
Let's suppose your API ENDPOINT is https://XXXXXXXXXX.execute-api.us-east-2.amazonaws.com/default/github-invite-users-endpoint. To send an invite, you'll
need to add two query params to the URL: usernameToAuthorize and repository.
Here is an example of the full URL: https://XXXXXXXXXX.execute-api.us-east-2.amazonaws.com/default/github-invite-users-endpoint?usernameToAuthorize=YOUR_GITHUB_NAME&repository=REPOSITORY_NAME. You'll just need to replace the repository name and the username you want to authorize.
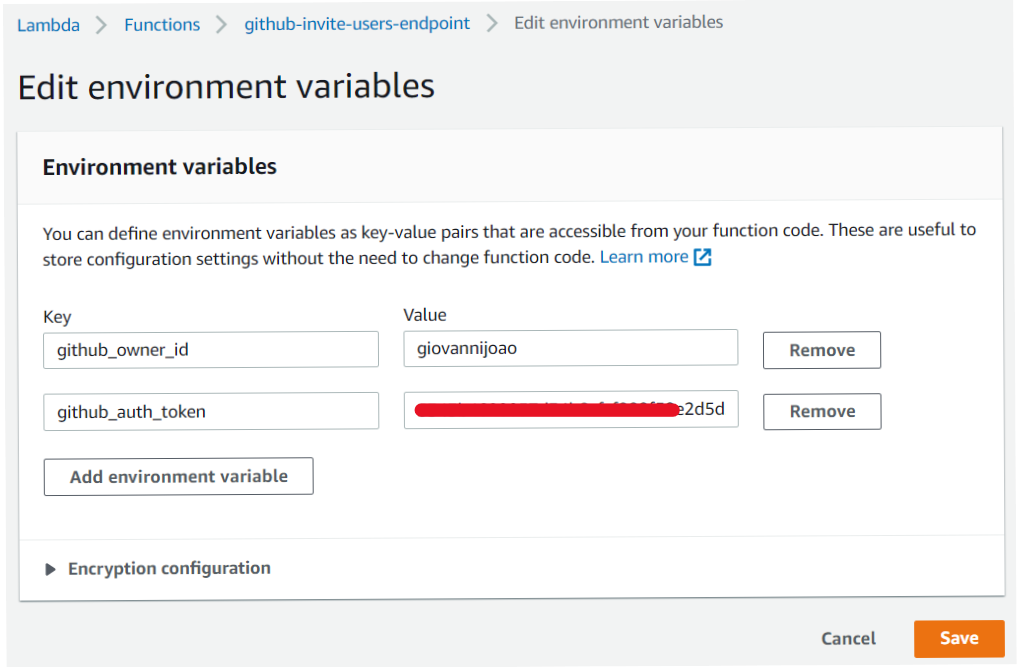
Environment Variables configuration
We need to use environment variables for better We're going to configure two variables in the Lambda.
- github_owner_id: your github username
- github_auth_token: a personal access token with the permission
repo: invite. If you have any doubts, see Creating a token.
To configure these variables, click in Configuration right above the Code source, then Environment variables and Edit.

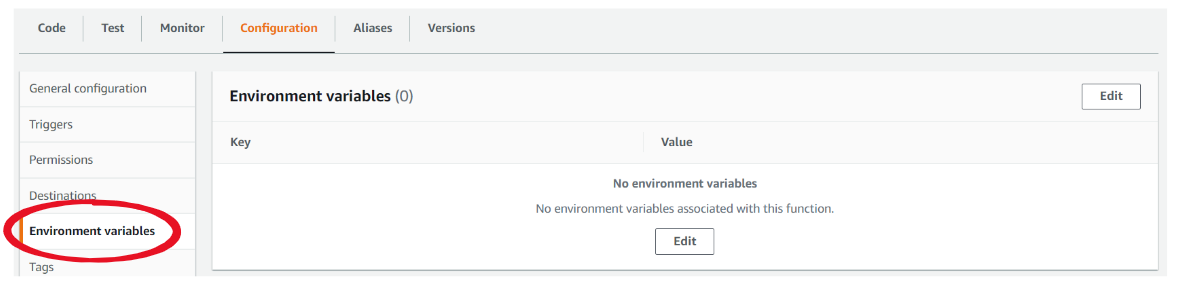
Now, add the variables I mentioned before and Save them.
Coding the function
After we finished all the configuration, let's code!
In the code source, put the following code:
const { Octokit } = require("@octokit/rest");

const {
    github_owner_id,
    github_auth_token
} = process.env;

const octokit = new Octokit({
  auth: github_auth_token,
});

const formatResponse = (statusCode, body) => ({
    statusCode,
    body: JSON.stringify(body)
})

const ALLOW_AUTHORIZATION_TO_REPOS = ["test-repository"];

const REPOSITORY_PERMISSION = "pull";
exports.handler = async (event) => {

    const missingLambdaConfiguration = !github_owner_id || !github_auth_token;
    if (missingLambdaConfiguration) return formatResponse(500, {
        message: 'Missing lambda configuration'
    });

    const { queryStringParameters } = event;

    const missingUsernameToAuthorize = !queryStringParameters?.usernameToAuthorize;
    if (missingUsernameToAuthorize) return formatResponse(400, {
        message: 'Missing query param: usernameToAuthorize'
    });

    const missingRepositoryName = !queryStringParameters?.repository;
    if (missingRepositoryName) return formatResponse(400, {
        message: 'Missing query param: repository'
    });

    const { repository: selectedRepository, usernameToAuthorize } = queryStringParameters

    const selectedRepositoryNotAllowed = !ALLOW_AUTHORIZATION_TO_REPOS.includes(selectedRepository);
    if (selectedRepositoryNotAllowed) return formatResponse(401, {
        message: 'Unauthorized'
    });

    await octokit.repos.addCollaborator({
      owner: github_owner_id,
      repo: selectedRepository,
      username: usernameToAuthorize,
      permission: REPOSITORY_PERMISSION
    });

    return formatResponse(200, {
        message: `Sent invite to ${usernameToAuthorize} access ${selectedRepository}.`
    });
};
Code Review
- You can access environment variables at
process.env. - A Lambda function must export a constant function called handler:
exports.handler = async (event) => {. - This function should return an object with statusCode and a string body. To help with that, I created the function
formatResponsethat basically creates this object.
- This function should return an object with statusCode and a string body. To help with that, I created the function
- The constant
ALLOW_AUTHORIZATION_TO_REPOSis used to list all repository names that can have invitations sent. If you want to, you can change the value for a new environment variable you can create, and split the variable to make a list. Just like this:const ALLOW_AUTHORIZATION_TO_REPOS = process.env.allow_authorization_to_repos.split(';') - If you missed some configuration, you'll get a message
Missing lambda configurationas the response. - If the query params usernameToAuthorize or repository are not sent, a Bad Request error will be returned as a response.
- If the received repository name is not included in the constant
ALLOW_AUTHORIZATION_TO_REPOS, you'll get an Unauthorized error. - If everything is correct and worked properly, you'll receive a message informing you that the invite has been sent.
That's it!
From now on, you can send to whoever you want the endpoint and the instructions on how to use it. But, be careful with who or where you share it. It should never be public published. The reason for that is not only that ANYONE can access the repositories you allow but also the danger of receiving a lot of requests and exceeding the free tier usage in AWS.
Thanks very much. I hope you liked this tutorial. If you have any doubts or suggestions, please let me know! 🚀